Island or Peninsula?
An island is a set of independent cabinets placed in the center of the kitchen, separate from the walls. These structures can vary in size and functionality, housing appliances, providing extra storage space, and serving as a workspace or dining area. It will have two side panels, one on each side.

A peninsula is similar to an island but with a key difference: one of its ends is attached to the kitchen structure. This creates a "U" or "L" layout, partially closing off the space and providing additional workspace without taking up as much room as a freestanding island. It will have only one side panel.

About the island back panels
The back panels of an island should have a height of ↕88 cm, which is the result of adding the ↕80 cm cabinet height plus the ↕8 cm legs. Regarding the width, they must match the width of the cabinet, but considering logistical limitations: our pallets have maximum dimensions of 250 cm x 80 cm, so no panel can exceed 80 cm in width.
As a result, the back of the island will require cuts. Ideally, these cuts should align with the joints between IKEA cabinet structures. However, since gaps may occur when assembling an island, manufacturing the panels at exactly 60 cm could cause fitting issues.
To avoid this, we supply the panels slightly oversized: usually at 62 or 65 cm for 60 cm wide cabinets, and at 42 cm for 40 cm or 80 cm wide cabinets. This way, the panels can be trimmed on-site to fit the island's final dimensions precisely.
For more details on how to make these adjustments, you can consult our Cutting Guide.
Islands or Peninsulas with Cabinets on One Side
These are islands with a single row of cabinets, consisting of the IKEA structure, CUBRO fronts on one side (doors or drawers), and a back panel on the other.

Required Materials:
-
Assembled METOD structure
-
CUBRO panels and fronts
-
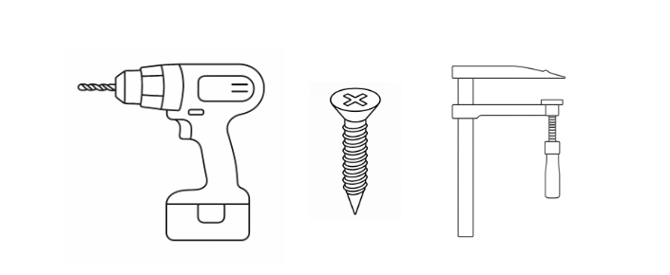
1.5 cm and 3.5 cm screws
- Clamp
- Drill or screwdriver
- Circle saw + guide
- Measuring tape
- Sandpaper

For the installation, whether it is an island or a peninsula, always start from the side panel to establish the width of the island, since it is the one that will absorb the front on one side, and the back panel on the other.
Our side panel measurement for standard islands is:
- ↔ 64,6 cm in case of base units of ⤡60 cm
- ↔ 41,6 cm in case of base units of reduced depth ⤡37 cm
This measurement come from:
- IKEA furniture: 590 mm
- Connecting rail: 10 mm
- CUBRO front: 18 - 20 mm depending on the range.
- Clearances between fronts: 3 mm on each side
Instructions
-
Assemble the IKEA structures and screw them together with 1.5 cm screws, ensuring minimal gaps with the help of a clamp.

-
Position the connection rail at 10 mm by setting the furniture’s metal brackets in their farthest position.
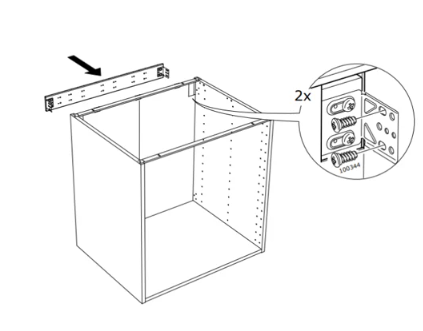
-
Place the assembly kit at both the top and bottom of the cabinet at the back.
About the back panels
As mentioned above, we ship the back panels oversized: generally at 62 or 65 cm for 60 cm wide units, and at 42 cm for 40 cm or 80 cm units. This allows for on-site cutting, ensuring a precise fit to the actual dimensions of the island.
Once the cabinets have been assembled and the side panels have been screwed on:- Measure the panels and decide which ones to cut, there are two options:
- You can cut them all a few cm to fit the IKEA structures
- You can go splicing one after another and make a single cut to the panel that has more surplus.
- Proceed to make the cuts. We recommend cutting one at a time to be able to adjust the measurements according to the assembly.
- Screw the rear panels to the rear kit with screws from the inside, with 3.5 cm long screws, fastening them with the clamp.
- Please check our Cutting Guide before making any cuts.
Islands or peninsulas with furnishings on both sides
When cabinets are placed on both sides, only side panels are needed.
-
- Example with two ⤡60 cm cabinets

-
- Example with one ⤡60 cm cabinet and one ⤡37 cm cabinet

Required Materials
- IKEA connection rail
- Floor anchoring structure for island, 210 cm
-
1.5 cm and 3.5 cm screws
- Clamp
- Drill or screwdriver
For installation, if you have a CUBRO countertop and it fits exactly (↕1260 or ↕1030 mm), use that measurement to position the cabinets. The side panels will come in standard sizes and will need to be cut, as we cannot produce panels wider than ↔80 cm.
Instructions
- Assemble the IKEA floor anchoring structure following the provided instructions.

- Assemble the IKEA structures and screw them together using 1.5 cm screws, ensuring minimal gaps with the help of a clamp.

- Place the countertop to ensure it overhangs approximately 2 cm on all four sides.
- Measure the total side dimension to calculate the required panel cut, ensuring that the ends extend at least 2 cm beyond the cabinet edge.
- Install the side panels using screws no longer than 3.5 cm.
Reference Links