For the installation of your CUBRO laminate or linoleum countertop, we explain step by step in this article:
Before you start
Our countertops generally come in standard pieces, in sizes of:
- ⤡62.3 cm or ⤡39.6 cm deep, depending on whether the furniture is 60 or 37 cm deep.
- ↕160 cm, ↕186 cm or ↕240 cm long, depending on the line of furniture to be covered.
This means that you will have to cut them to fit the line of your furniture, and join them together.
We recommend following one of these two options for the joint between countertops. Both are good options, it all depends on how you handle them.
- Metallic Connectors: Metallic connectors are joining hardware that helps secure countertops together. This hardware consists of a threaded rod that connects two metal semicircles.
- Wooden dowels: The dowels are small wooden rods with rounded edges and longitudinal grooves that are used to avoid “steps” between the countertops so that both surfaces are perfectly level. In this case, it is also advisable to purchase the master positioner.

Tools Needed
- Measuring tape
- Drill
- Circle saw + guide
- Screwdriver
- PZ 1,5 cm Screws
- FIXA hardware: The FIXA hardware is especially important for the support areas of appliances that do not have a cabinet, such as the dishwasher and washing machine. For the rest of the furniture, you can also use standard angle brackets.
- Sandpaper
- Oil: included in the cleaning kit
- Spirit level
- Machining bit if you choose the metal connector option

1. Countertop Presentation
- Make sure your kitchen is ready, with all furniture properly assembled before starting the countertop installation.
-
The pieces of your countertop are labeled on their B-side. Make sure the A-side is visible before making any cuts or inserts.

- Place the pieces on the lower cabinets and adjust them to your measurements. The pieces will be oversized, and you will need to cut them to the necessary size.

- If your countertop consists of two or more pieces, follow our recommendations for countertop joints to ensure the ideal arrangement of your countertop sections.

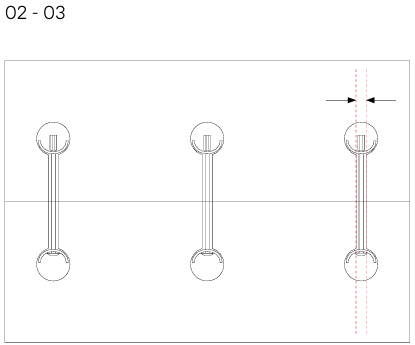
Countertop Overhangs
A countertop overhang occurs in sections where the piece has no support or attachment point.
Important:
- Maximum distance of unsupported countertop between cabinets: 800 mm
- Maximum overhang at the end of the countertop: 250 mm

To improve the support of this type of countertop, we recommend installing the FIXA pieces on the sides and the wall.

Once you are clear about the distribution of the countertop pieces, you can proceed to the cutting.

Important: Check our cutting guide before making any cuts and make sure the measurements are correct
2. Cutouts
Cutouts are the openings for the sink, faucet, and cooktop. The size of these openings will be determined by the model and manufacturer. We recommend following the manufacturer’s installation instructions.
2.1. Sink
You will need to make the cuts with a saw following the manufacturer's instructions.


To complete the installation, it is very important to seal the sink with silicone to ensure the durability of all areas where there is a risk of water leakage or moisture.
2.2. Faucet
You will need to make the hole with a crown the size of your faucet.

2.3. Cooktop
You will need to make the cuts with a saw following the manufacturer's instructions.

After making the cuts, pass the sandpaper and apply oil on the raw edge.
3. Fittings
Depending on the option you have chosen
Option 1: Joining worktops with metal connectors

- On the B-side of the countertop, perform the machining. Use a drill guide to create the circular hole. This machining should have a Ø 35mm diameter and 15.5mm depth.
- Create the joint channel between the two circular pieces using a chisel. This channel should be no deeper than 14mm and have a width of 10mm.
- Join the two countertop pieces and adjust them so they are firmly attached. The result should look like this on the B side:
Option 2: Wooden Dowels
- Machine the joining edge of the countertops. You will need to place three dowels per joint. Use a drill with an 8mm bit. We recommend using a template guide for precision.
- Apply glue to the dowels and insert them into the machined holes of one of the countertop pieces.

4. Fixing
On the sides of the lower cabinets, secure the FIXA support hardware (or angle brackets) with screws.


Water and Electrical Connections: To connect the water and electricity supplies for your appliances, hire a qualified professional.