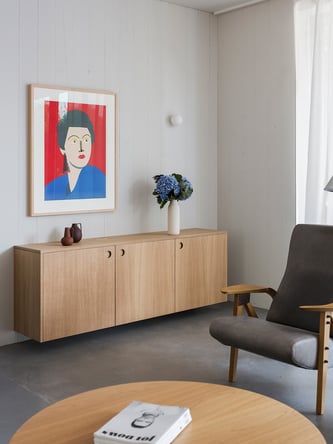
Thanks to their modularity, it is possible to assemble custom structures, to which CUBRO fronts, panels, and worktops are added.
Originally designed for kitchens, IKEA METOD modules offer great versatility due to their variety of heights, widths, and depths. At CUBRO, we take advantage of this modularity to offer solutions that transform these units into multipurpose dressers, benches, or even TV stands with storage, adapting them with our own fronts and finishes.
There are two main installation methods:
With legs and plinth
Offers a more classic and elevated look. Ideal if it's a continuation of a kitchen, as it allows for plinth continuity.

Without legs
Ideal for clean-lined solutions such as sideboards or TV furniture.
It can also rest directly on the floor, like a bench.

Each option involves a different assembly process, detailed below.
Before Assembly
The assembly is simple but requires technical tools as listed below. Read this guide or check this article if you have any doubts.
In this case, the top worktop can be used as a bench only if solid wall fixing and a stable structure are ensured, following IKEA’s suspension rail instructions.
If the unit sits on the floor, you'll need to remove the room’s skirting board so it fits flush against the wall.
Required Tools
-
Measuring tape
-
Spirit level
-
Hand saw
-
Clamp
-
PZ screws, max. 3.5 cm
-
Wall plugs
-
Drill
-
Wall screws: IKEA does not include these as every wall differs, but we recommend at least 50 mm long

Assembly Instructions
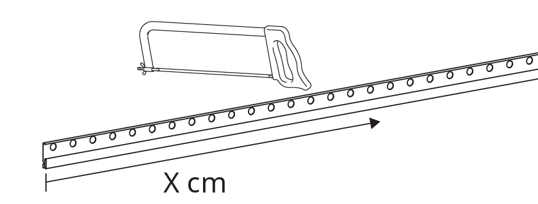
Common Initial Step: Installing the METOD Rail
Before mounting the modules, prepare the main fixing. Consult this article for more info.
-
Measure the total width of the unit
-
Add up the widths of all the METOD structures you'll use.
-
Cut the METOD rail to length: Use a hand saw.
-
-
Fix the rail to the wall
-
Measure the desired installation height:
-
If using legs, consider their height when placing the rail.
-
If without legs, define the total height from the floor to the top of the module.
-
-
Screw the rail to the wall with proper screws depending on the type of your wall, ensuring it is perfectly level.
-
Refer to the IKEA rail installation guide for more details.
-
1. Dresser Without Legs
Once the rail is installed:
-
Mount the METOD cabinets
-
Hang each module on the rail, slotting it into place.
-
-
Join the cabinets
Align the structures properly.-
Use clamps to hold them temporarily, then screw them together with the screws included with the METOD cabinets.
-

3. Finishings
-
-
Install the CUBRO fronts (doors or drawers).
-
Add side panels and the top worktop, securing both to the cabinet body with a clamp and 3.5 cm screws.
-
See our side panel installation guide for further information.
-
2. Dresser With Legs and Plinth
After attaching the rail and hanging the modules:
-
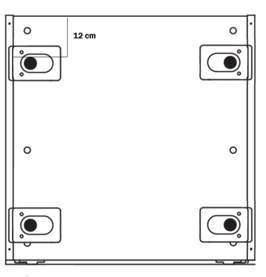
Precise measurement for the plinth
-
Mark and fix the legs at the same distance from the front edge on all modules:
-
The leg must be placed 12 cm from the front edge to allow the 10 cm set-back.
-
-
-
-
This ensures the CUBRO plinth is aligned and continuous.
-
-
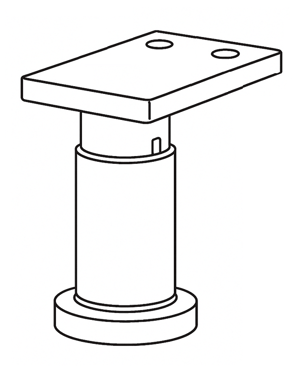
Installing the legs
Wall modules don’t have holes for METOD leg dowels, so a small hack is needed:
-
Cut the dowels with a hand saw.
-
-
-
Use the existing holes to screw the legs directly to the module base.
-
-
Join the cabinets
-
Once positioned, connect the cabinets as before: use clamps to hold them temporarily, screw them together with the screws included with the METOD cabinets.
-
-
Final finishings
-
Install the CUBRO fronts (doors or drawers).
-
Add the side panels and top worktop, securing them with a clamp and 3.5 cm screws.
- See our side panel installation guide for further information.
-